- Home
-
Categories
- Car Diagnostic Tools
- Original Brand Tools
- Car Key Programmers
- OBD2 Code Scanners
- Truck Heavy Duty Scanners
- ECU Chip Tuning Tools
- Odometer Correction Tools
- VAG Diagnostic Tool
- Software Update Service
- Original Launch X431 Tools
- Car Key Blanks
- Key Cutting & Locksmith Tools
- Airbag/Service Reset Tools
- OBD2 Cables and Connectors
- AUGOCOM Camshaft Engine Timing Tool
- Other OBDII Vehicle Tools
- Car Key Chips
- Car Key Blades
- Car Diagnostic Software
- Automotive Electrical Testers & Test Leads
- Auto HID Xenon Light and LED Light
- Consumer Electronic
- Automotive Electronics
- VIDENT OBD2 Diagnosis
- MB Star Diagnostic Tools
- Health Care
- Special Deals
- Consumer Electronics
- Repair & Maintenance Tools
- Expired Tools
- Outdoor
- Home & Garden
- Top Selling
- New Arrivals
- for MB
- for Porsche
- Xhorse
- for TOYOTA
- for FORD
- Order Tracking
- Drop-ship
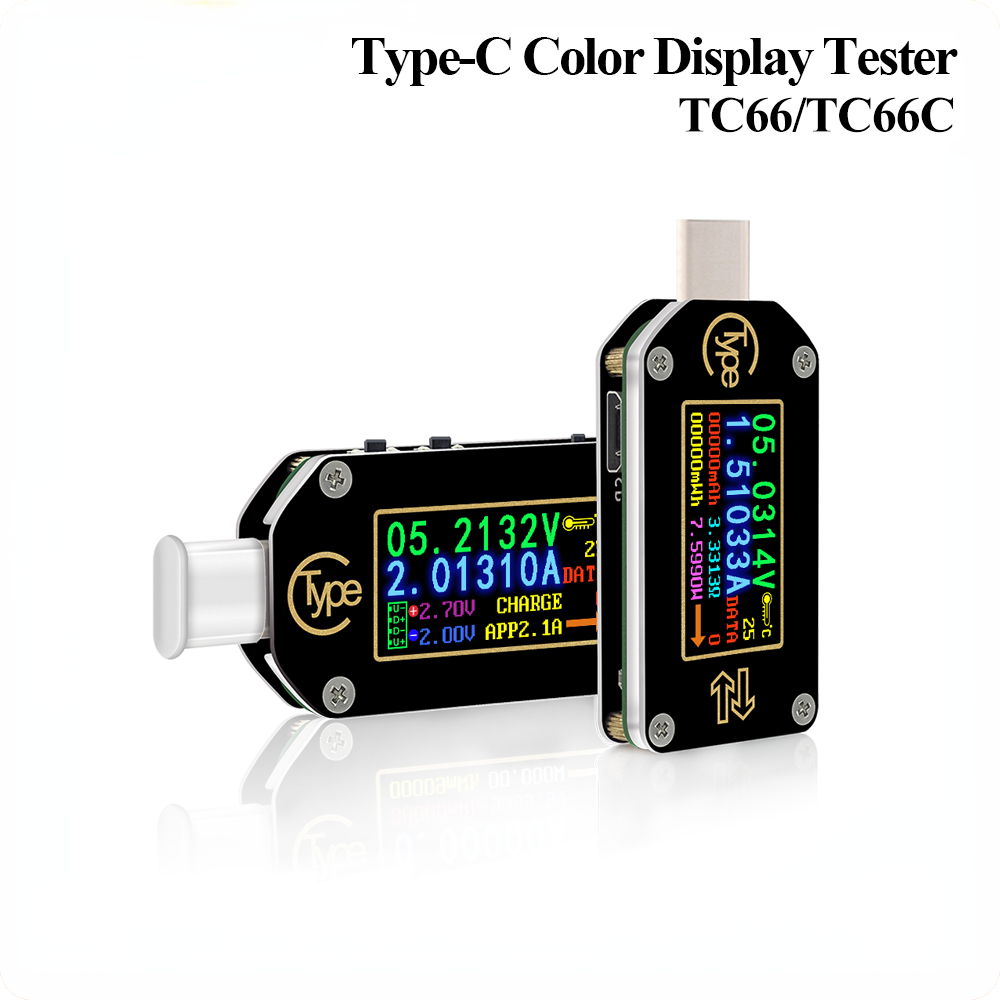
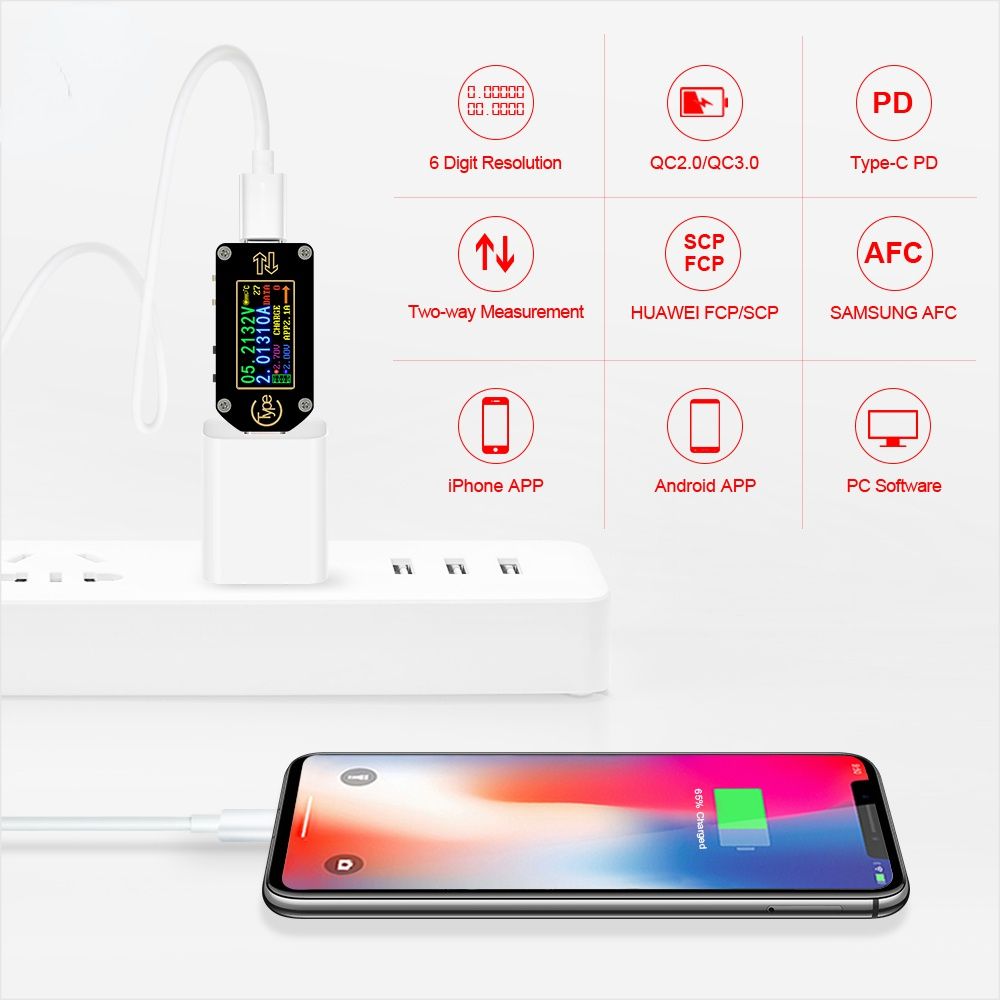
TC66/TC66C Type-C PD trigger USB-C Voltmeter ammeter voltage 2 way current meter multimeter PD charger battery USB Tester
- Shipping:
- Airmail Post
Estimated delivery time: 7-45 working days.See details» - Returns:
- Return for refund within 7 days,buyer pays return shipping.Read details »
- Support:
-
 Online Chat
  WhatsApp
  Skype
Skype  Ask a question
- Product Details
- Product's Reviews
- Write a Review
- Related Products


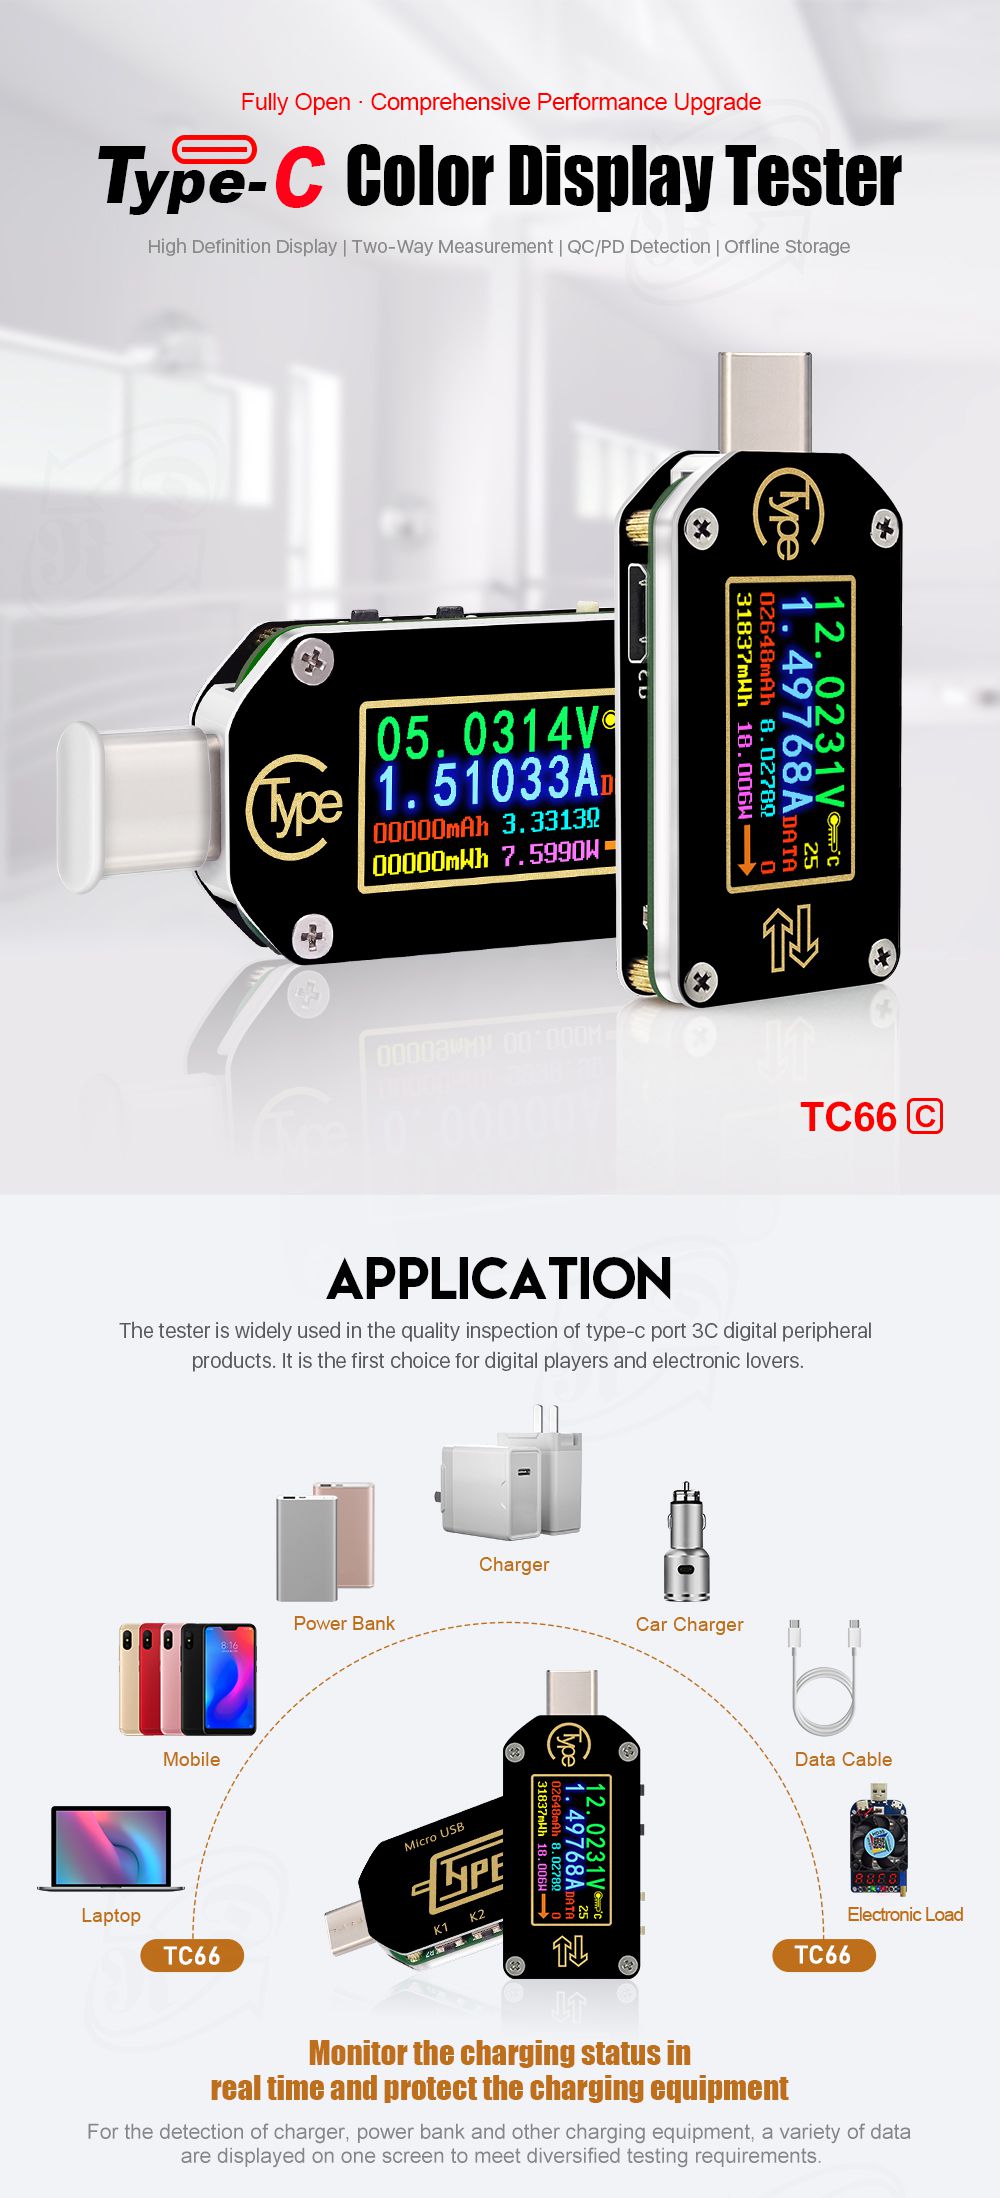
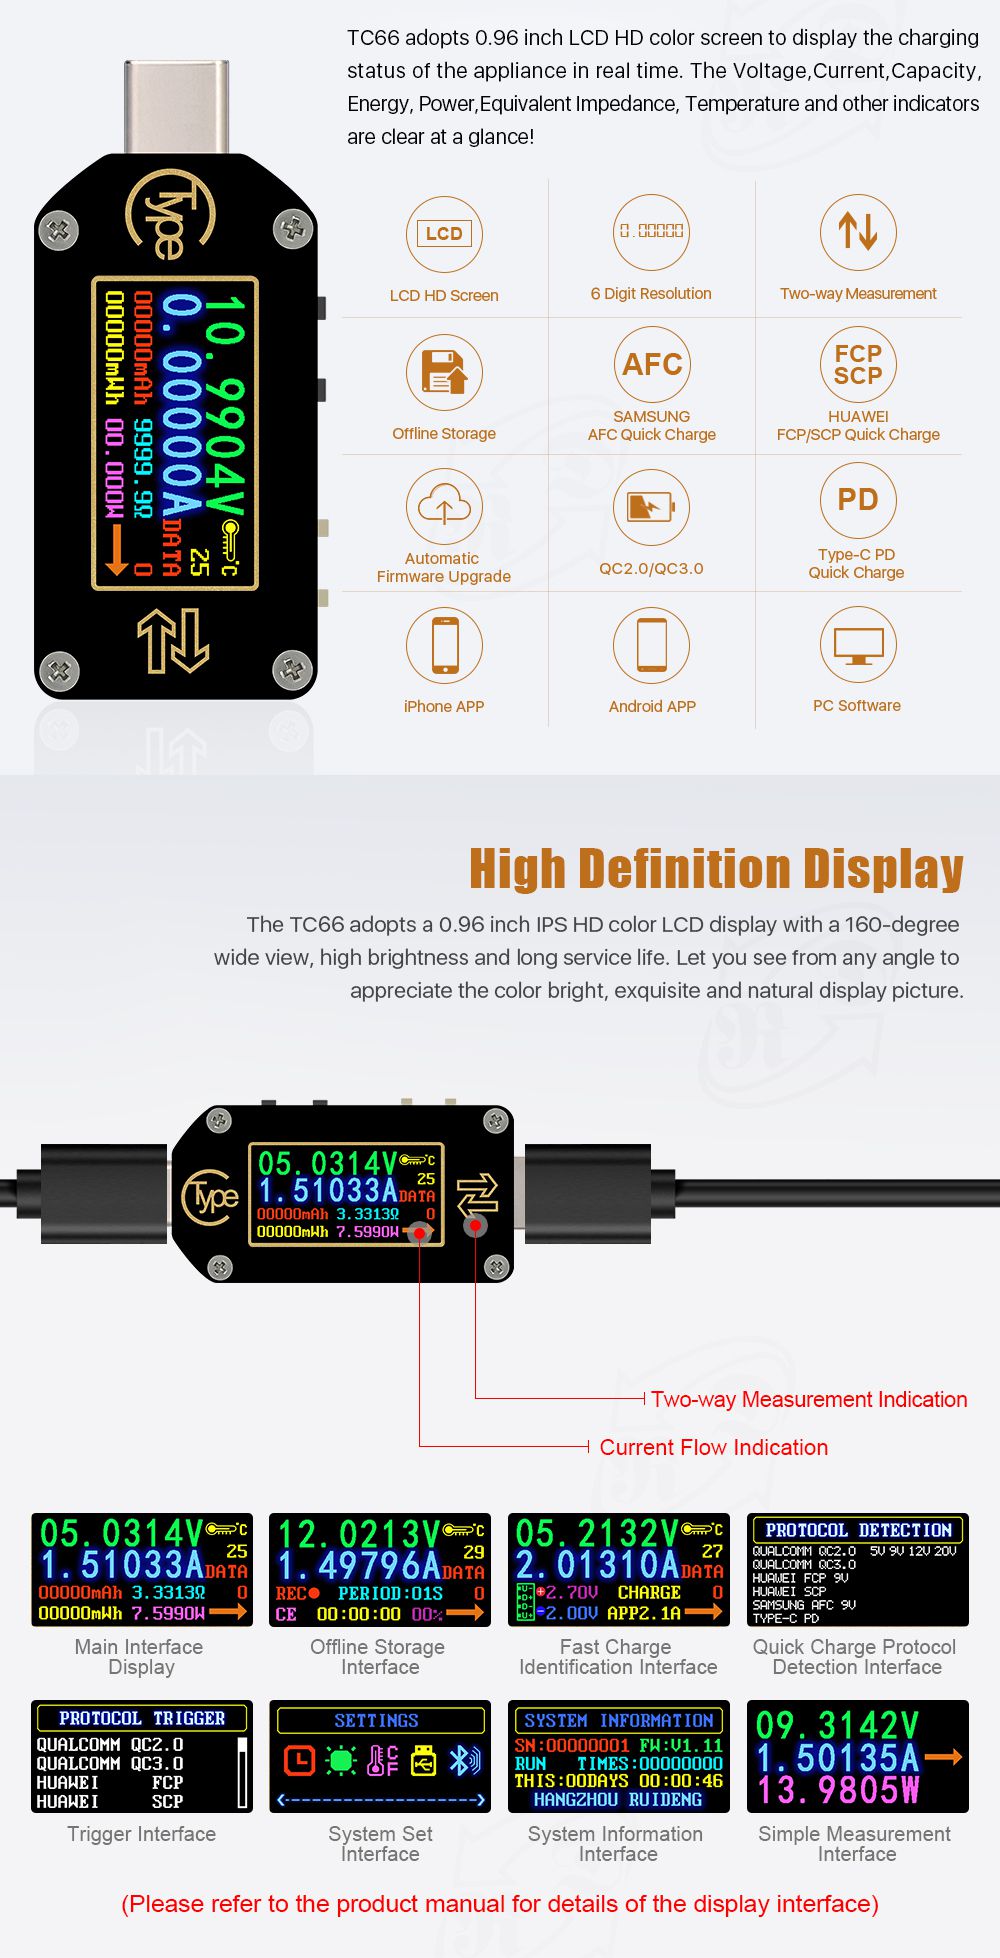
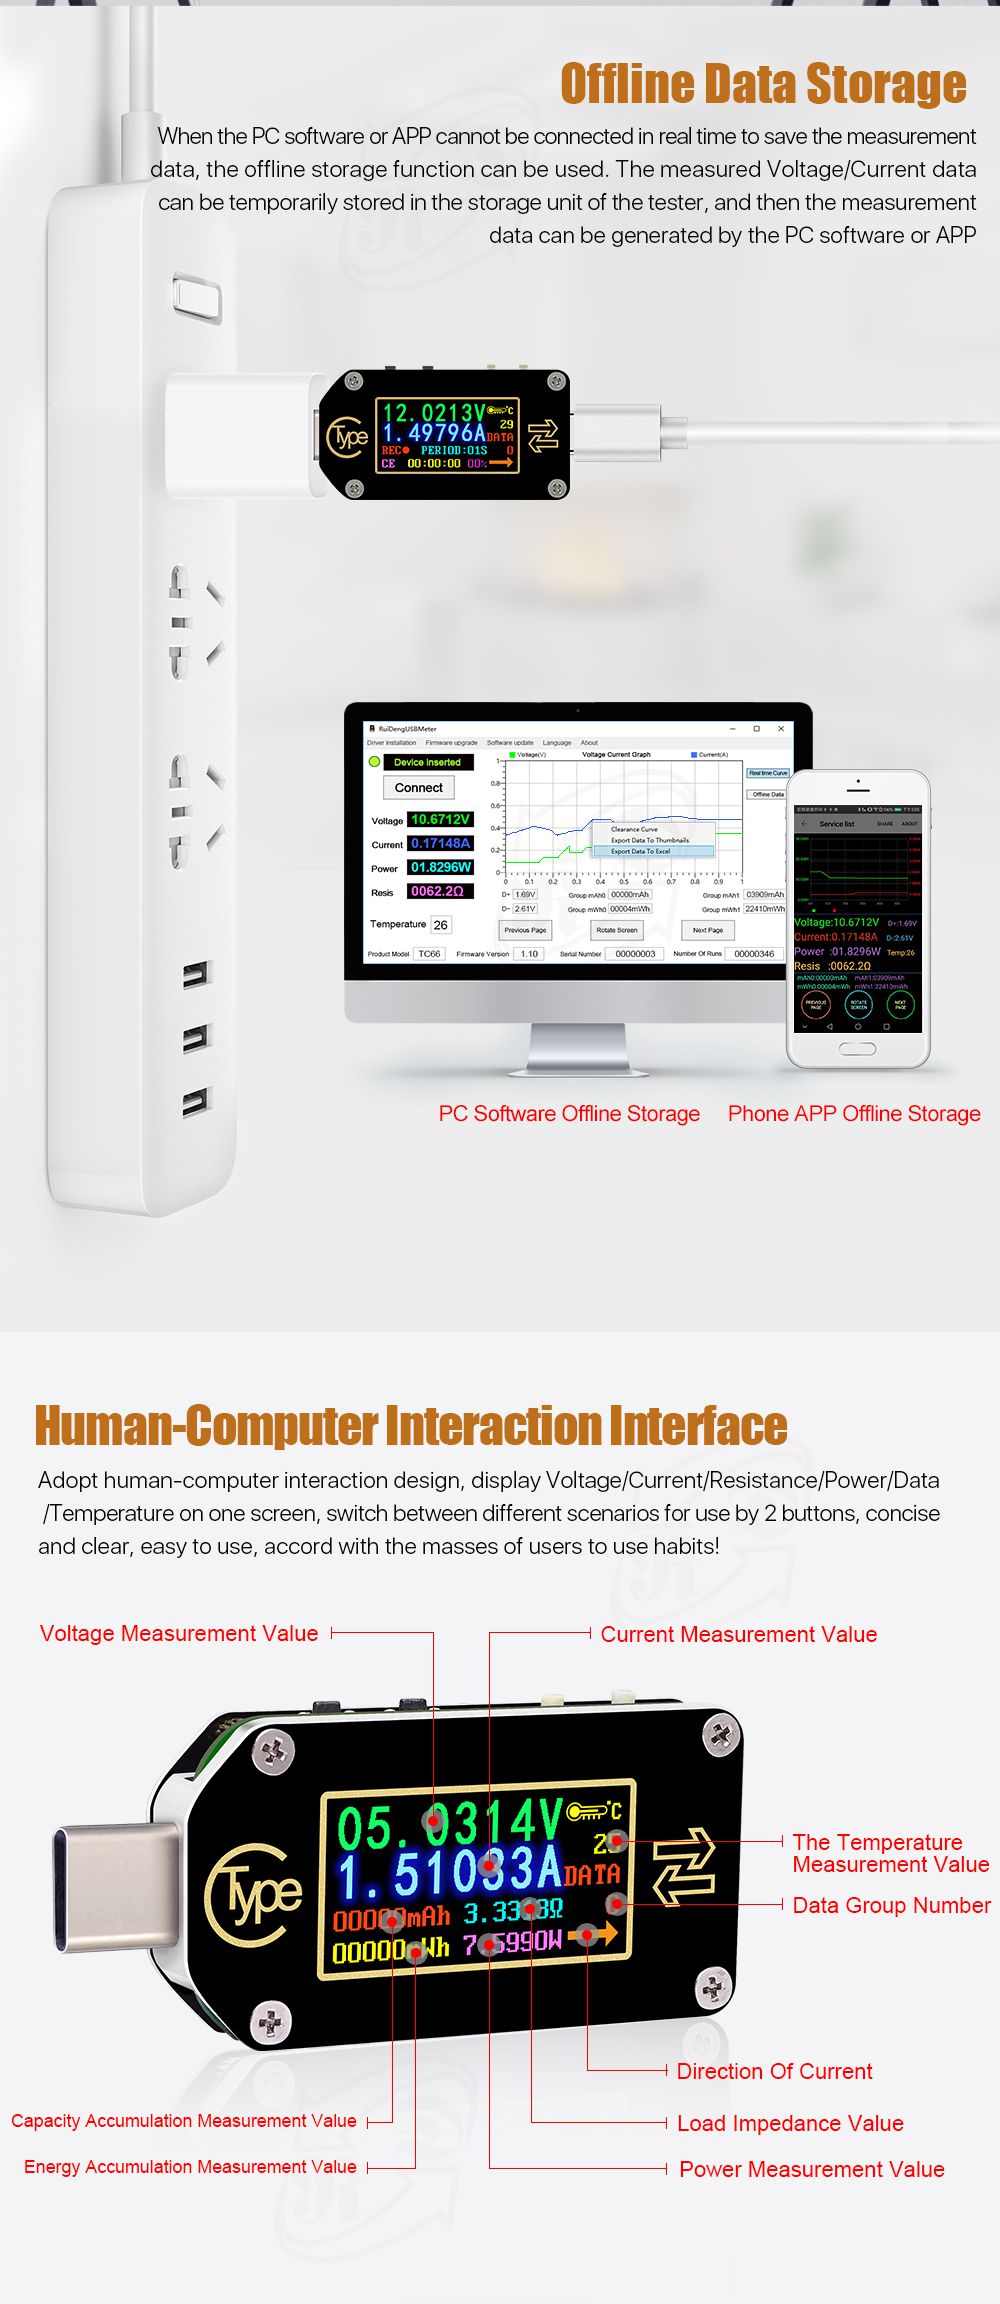
| Model: TC66/TC66-C | Display screen:0.96Inch color IPS display |
| Voltage measurement range:0.0050-30.0000V | Voltage measurement resolution:0.0001V(0.1mV) |
| Current measurement range: 0-5.00000A | Current measurement resolution: 0.00001A(0.01mA) |
| Supply voltage:3.5-24V | Screen Resolution: 160*80 |
| Capacity accumulation range: 0-99999mAh | Voltage measurement accuracy:±(0.05%+20digits at 23℃) |
| Energy accumulation range:0-99999mWh 999.99Wh | Current measurement accuracy: ±(0.1%+30 digits, at 23℃) |
| Load impedance range: 1Ω-9999.9Ω | Power measurement range:0-150W |
| Temperature measurement range:0℃~45℃/32℉~113℉ | Refresh rate: 2Hz |
| Working temperature range: 0~45℃/32℉~113℉ | Auto screen off time: 0-9mins |
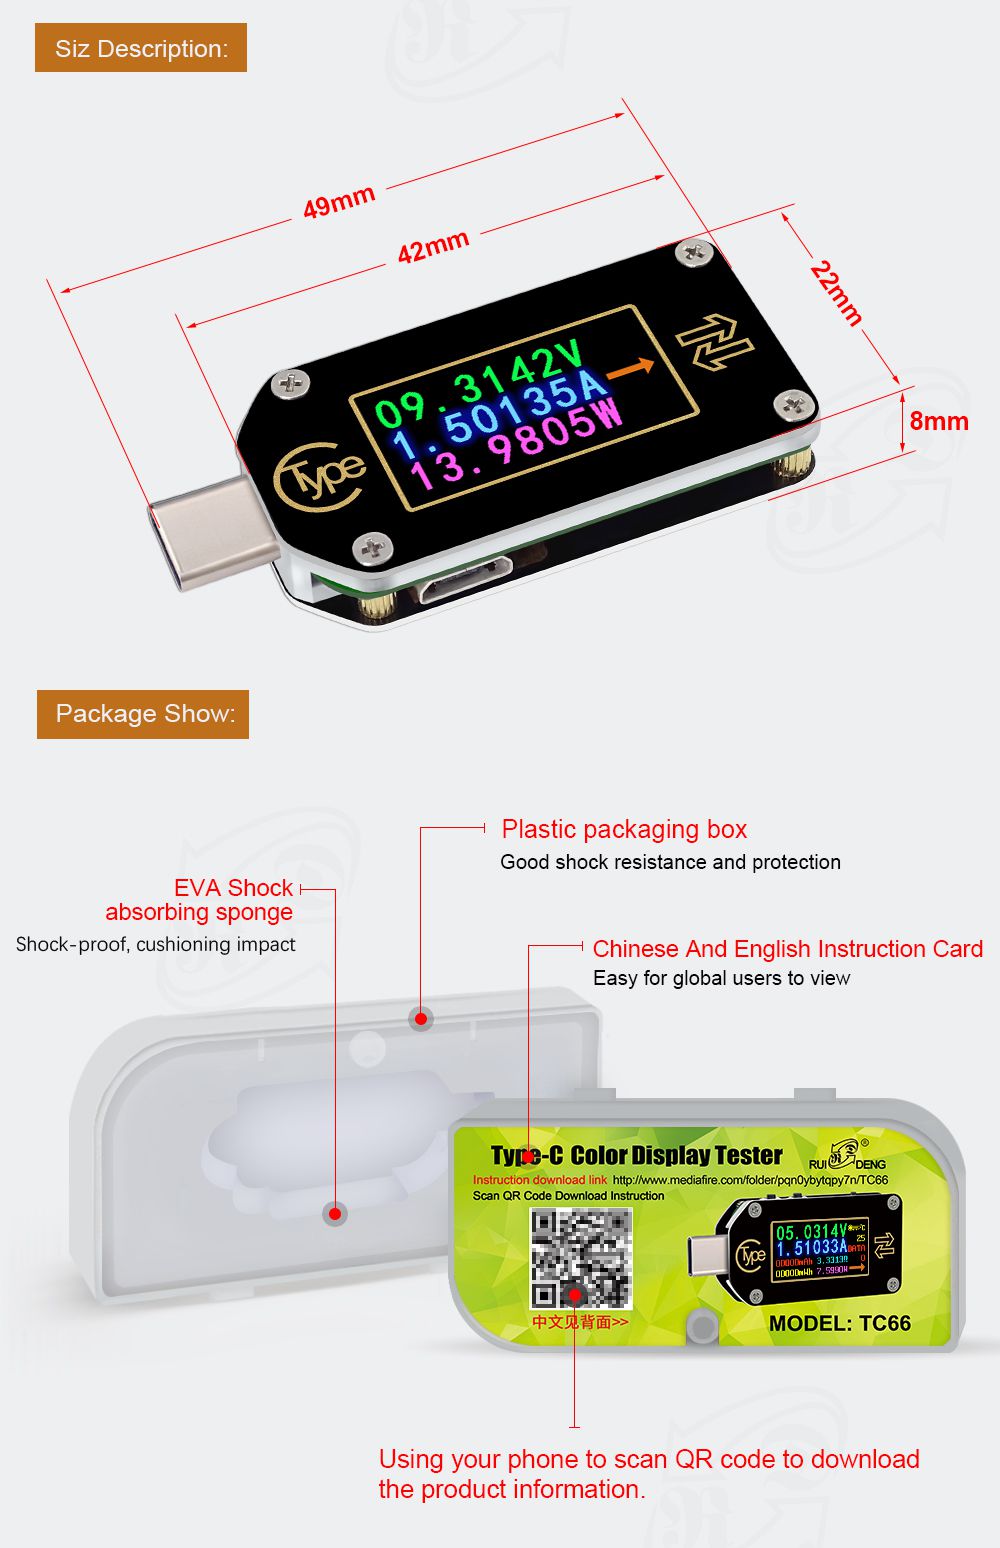
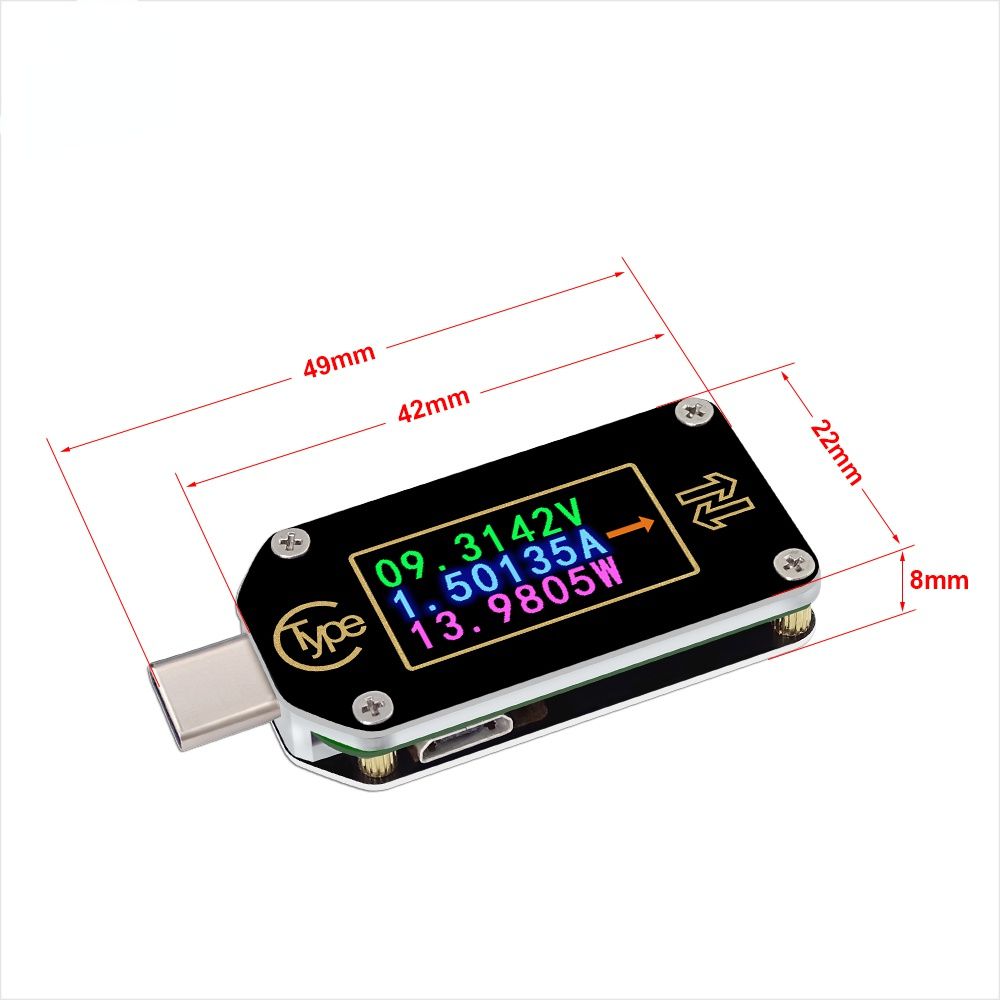
| Dimensions:49mmx22mmx8mm | Product weight: about 8g (withpackage 22g) |
| Quickchargerecognition mode:QC2.0、QC3.0、Apple2.4A/2.1A/ 1A/0.5A、Android DCP、Samsung | |



1,Instruction:
User manual, PC software installation instruction and PC software and Android APP download link:
Main link:http://www.mediafire.com/folder/pqn0ybytqpy7n/TC66
backup link:https://drive.google.com/drive/folders/1JS4mnXdM_VRUYa0ueRQUDR69b1_Lt7iG?usp=sharing
2,APP Download:
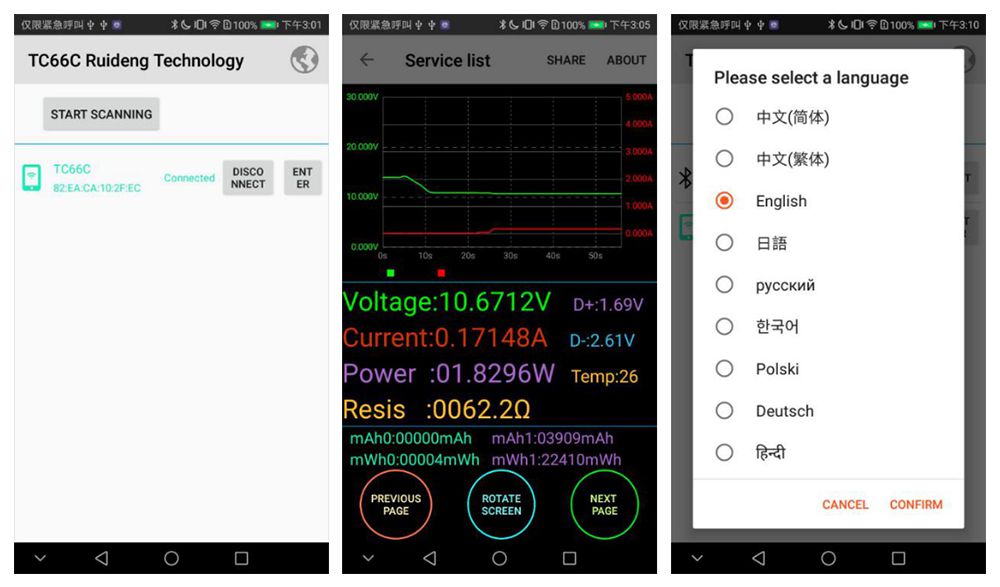
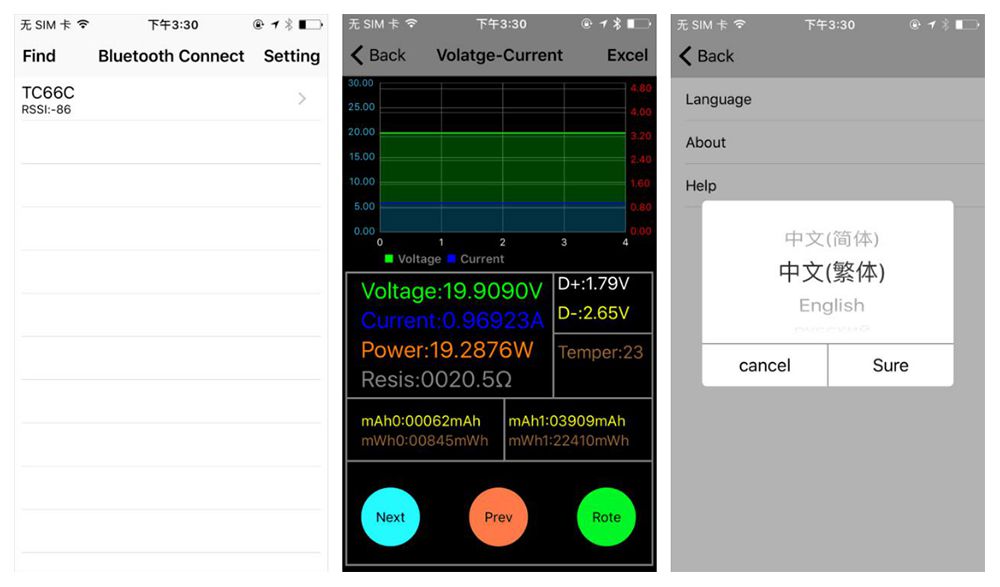
IOS APP:search "TC66C" in iPhone APP store
Android APP: search "RuiDeng" in google play

At present, the TC66C PC software is not compatible with Czech and Korean language windows systems. We are UPDATING it. If you mind, please do not buy.
DO NOT install the PC software at DISK C, please install the software at other disks
2, Correct Operation
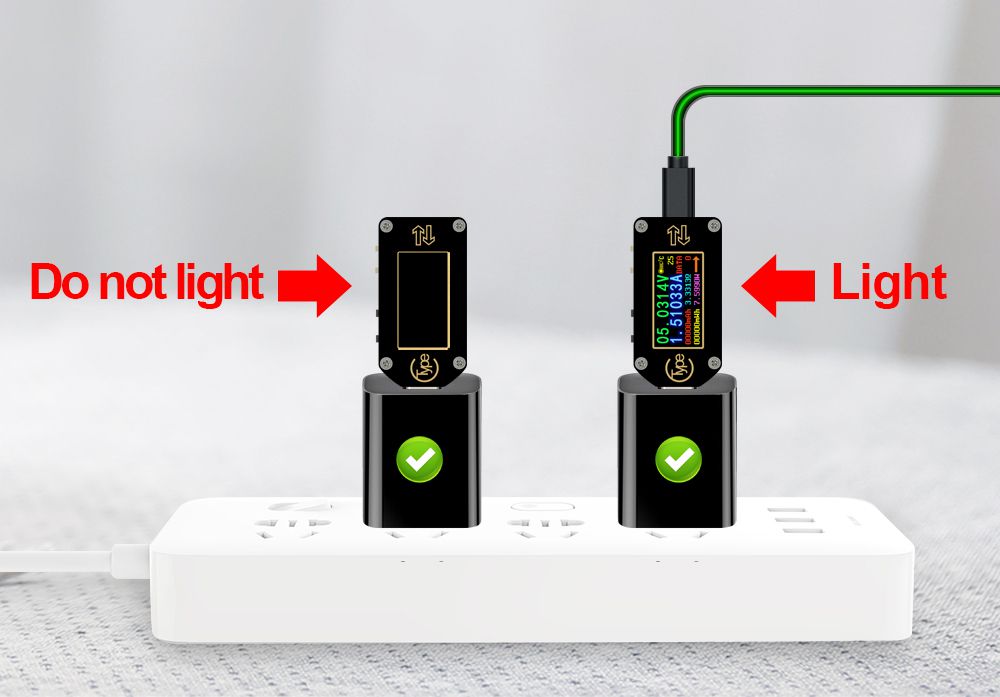
TC66 uses the double-headed Typec line for the decoy triggering operation, only one side can be used. If the screen does not light, please flip the interface.
3, Video
Operation and test video:https://youtu.be/SCVcSjDMx2g
4, Electronic USB Load
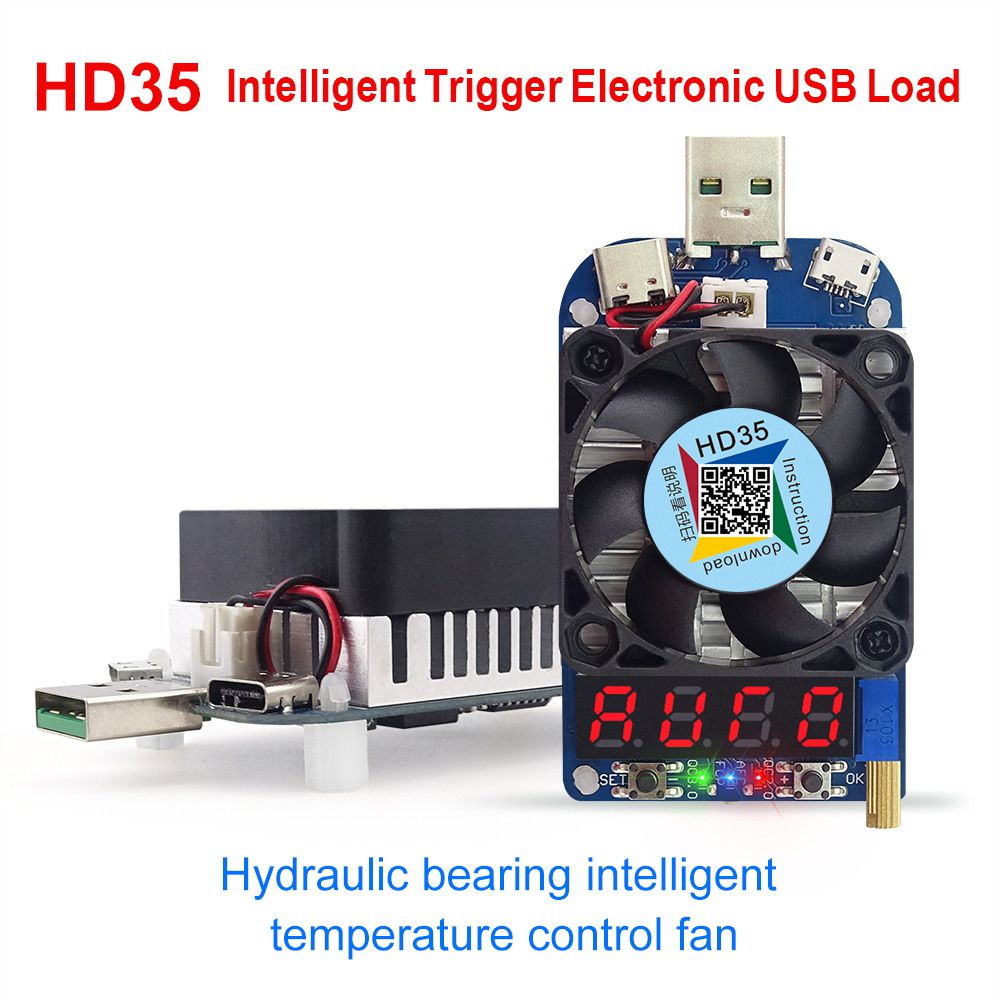
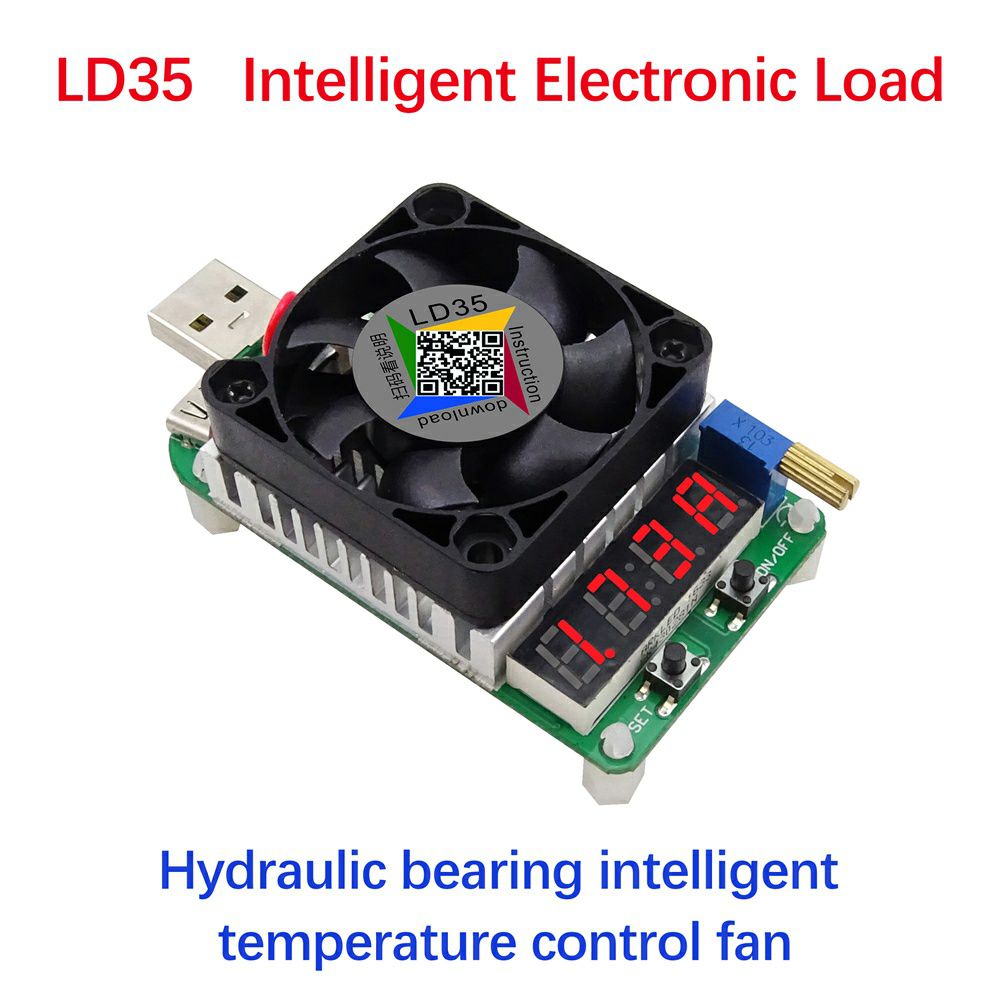
For electronic USB load, we have HD series and LD series 25W 35W load, you can choose by yourself, HD series has trigger mode, LD series only normal mode

PRODUCT QUESTIONS:
1. Q:What is the differences between TC66 and TC66C?
A: TC66 is no communication version, TC66C is conmmunication version by Bluetooth connection, both of them can connect to PC software by USB
connection
2. Q:The firmware of the product I receive is not the latest?
A: Because the firmware is updated when there is something changing, so you can use the PC software to update the firmware
3. What should I do with the PD switch?
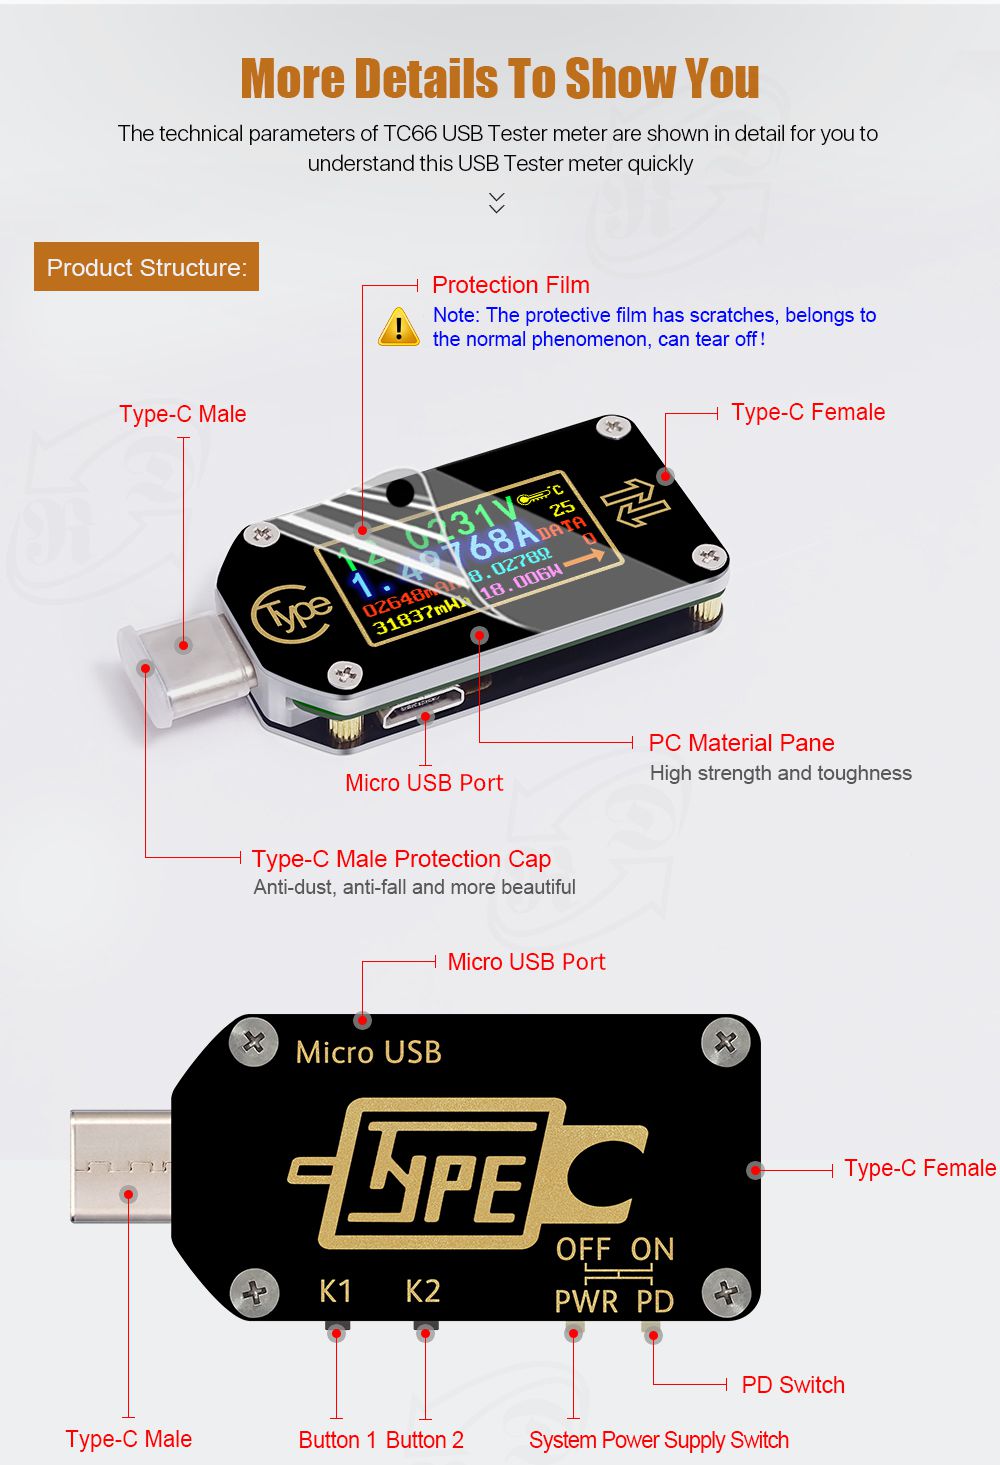
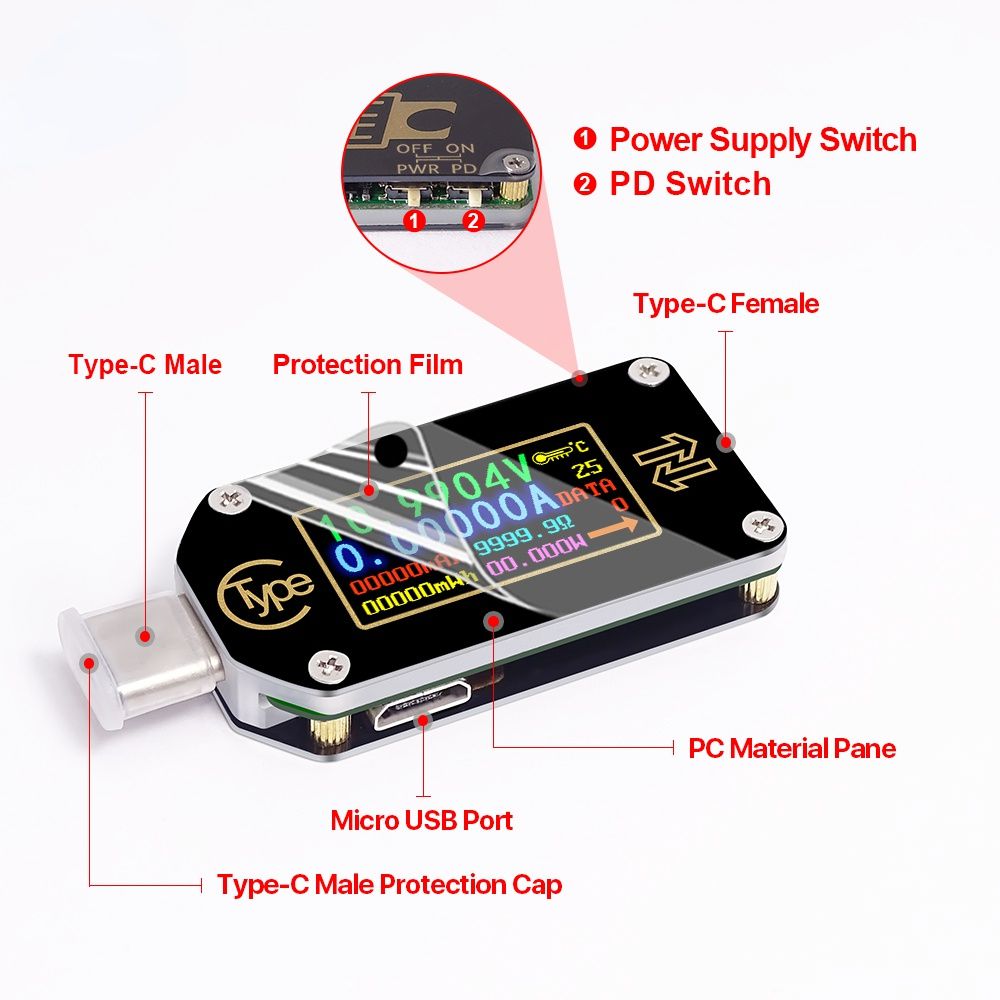
A:When using TC66 to detect the charger protocol, it is necessary to turn on the PD Switch. When using TC66 to detect the charging process of mobile phone, it is necessary to turn off the PD Switch.(No matter it is the hardware switch or the System Setting)
4.What should I do with the PWR switch?
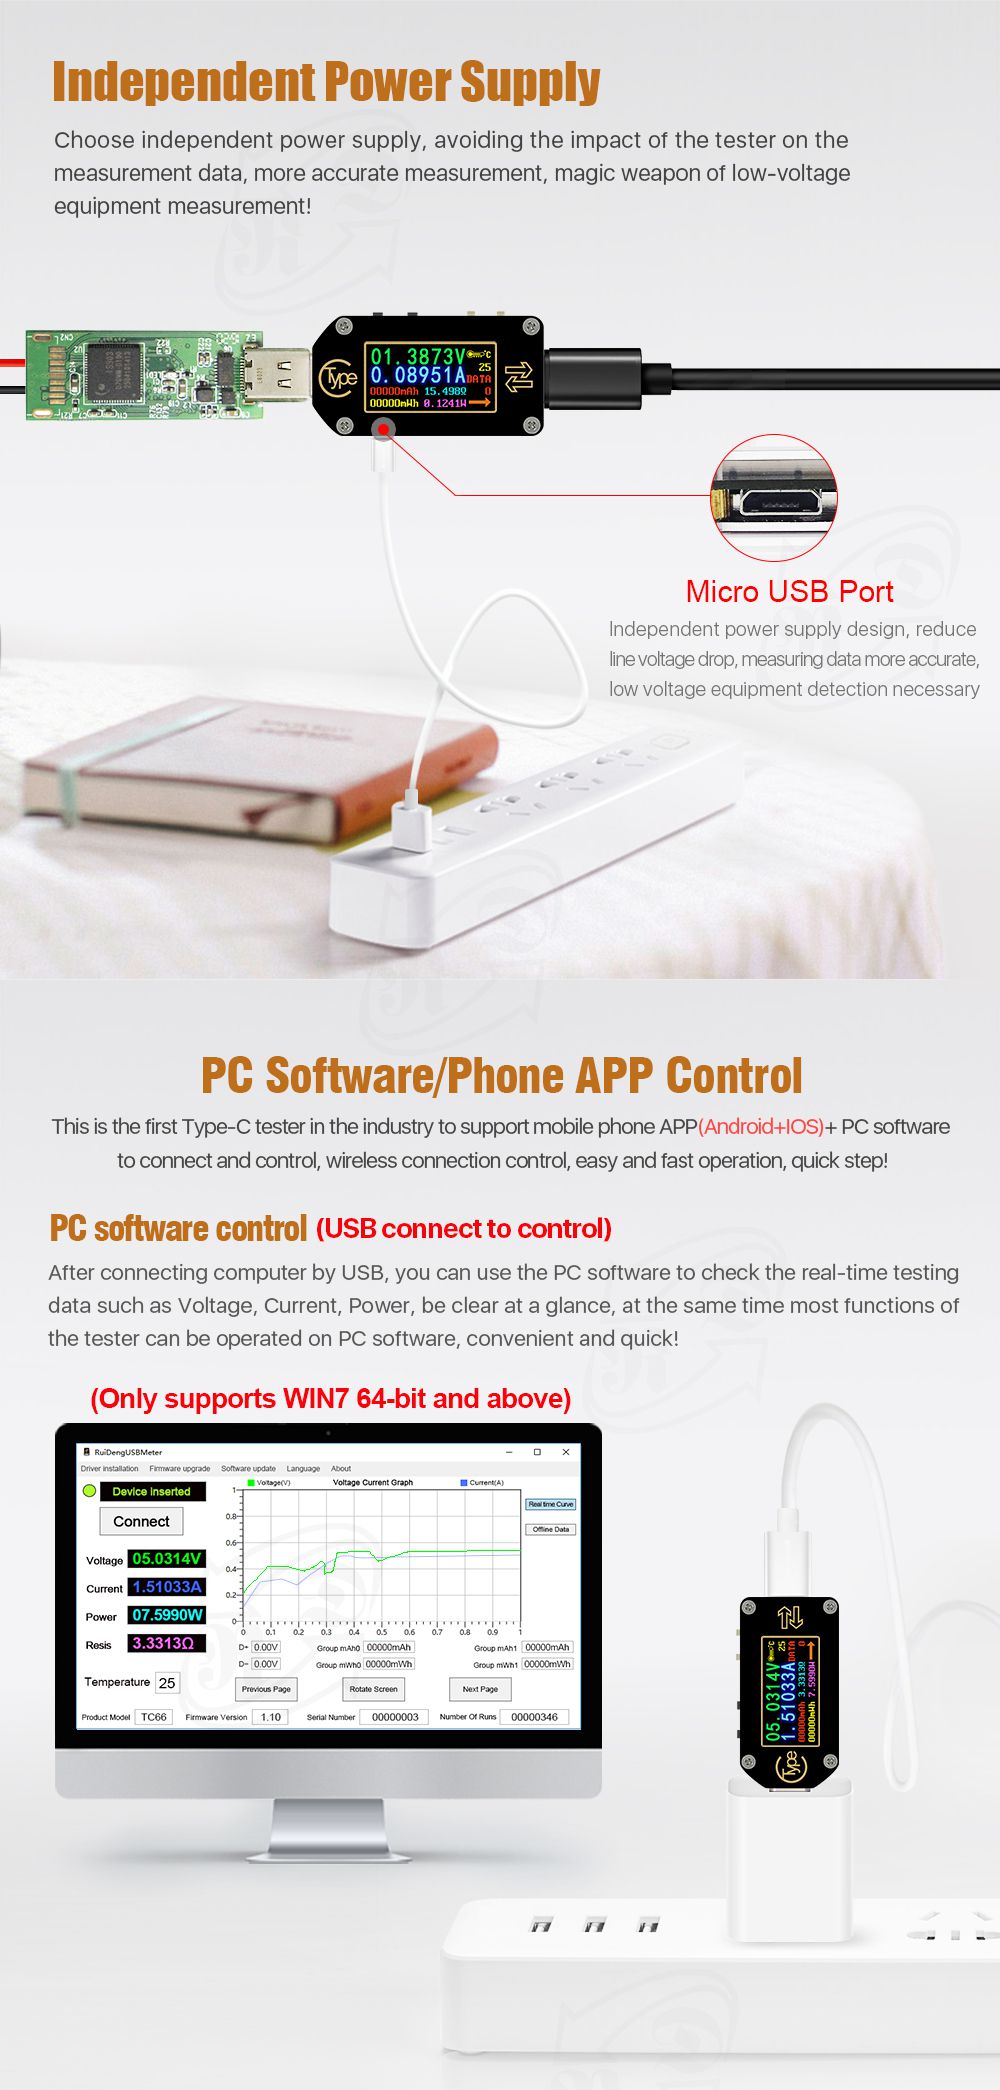
A:PWR switch means System power. When in use, set it to ON. If the voltage is less than 3.5v, use Micro to supply power independently and set the
PWR switch to OFF.
SOFTWARE QUESTIONS:
1. Q: what is the software crash problem?


|
| TC66(C) | |
| USB port | Type-C port | Type-C port |
| Expansion port | None | Micro-USB |
| Voltage measurement range | 3.70-30.00V | 0-30.0000V |
| Voltage measurement resolution | 0.01V | 0.0001V(0.1mV) |
| Current measurement range | 0-4.000A | 0-5.00000A |
| Current measurement resolution | 0.001A | 0.00001A(0.01mA) |
| Power measurement range | 0-120W | 0-150W |
| measurement method | current can pass in one direction | current pass in two direction |
| Identifiable fast charge protocol | QC2.0、QC3.0 | |
| Supported fast charge protocol | None | QC2.0、QC3.0、Huawei FCP、 |
| Trigger/decoy protocol | None | QC2.0、QC3.0、Huawei FCP、 |
| Interface Introduction | Main Interface Interface | Main Interface |
| Communication Function | None | PC software: work on Win7 or above |
| Special Function | None | 1. Detect supported/unsupported fast charge protocol |


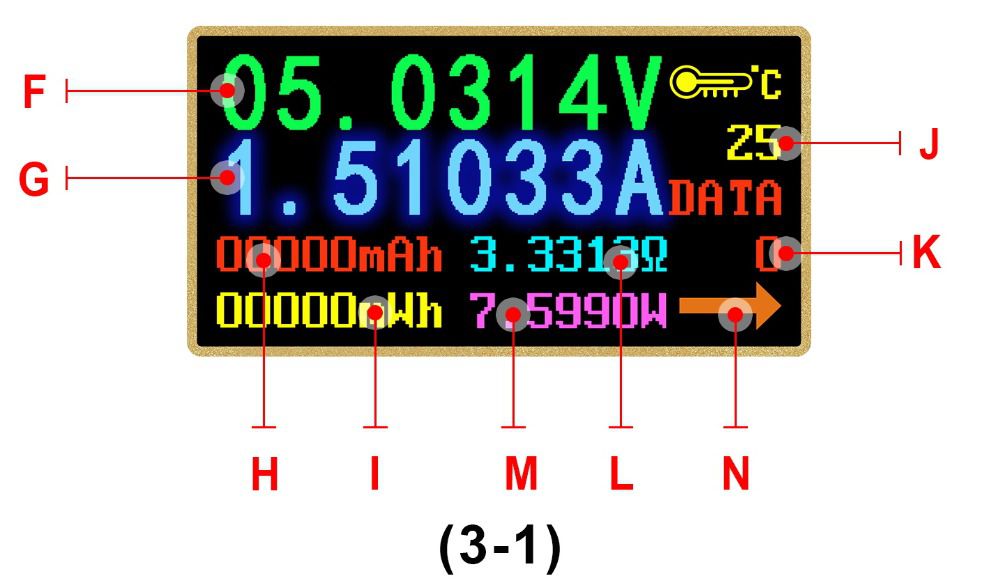
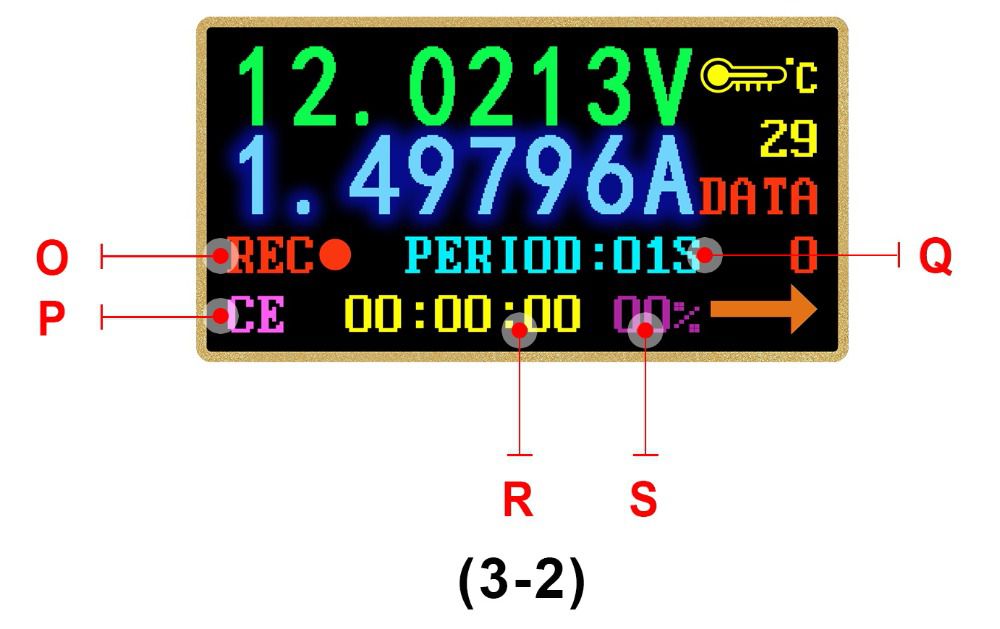
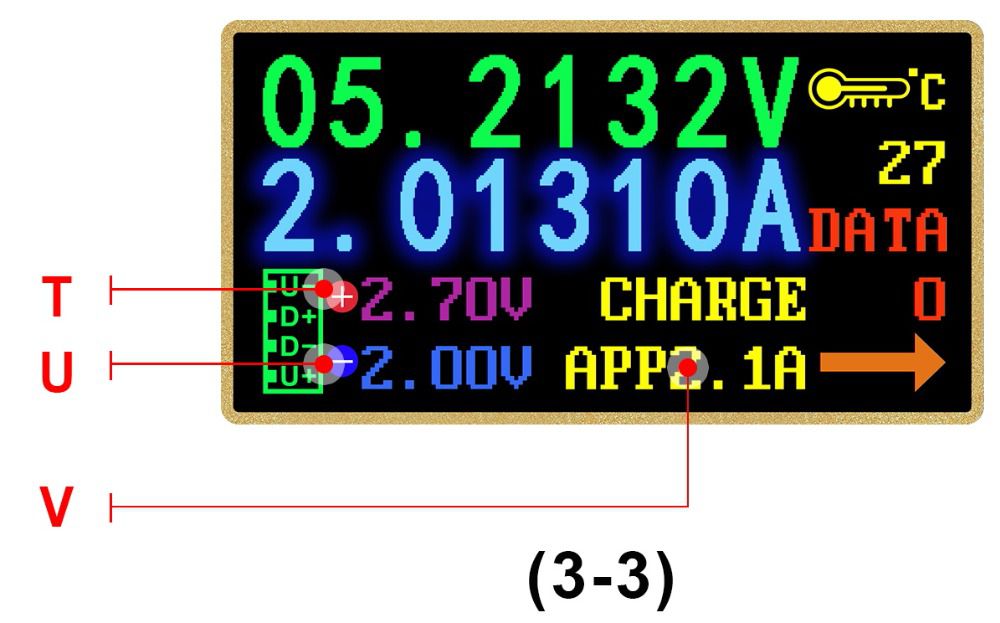
Instructions for Type-C Tester with Full Colour Display


3.5.1Trigger Operation:
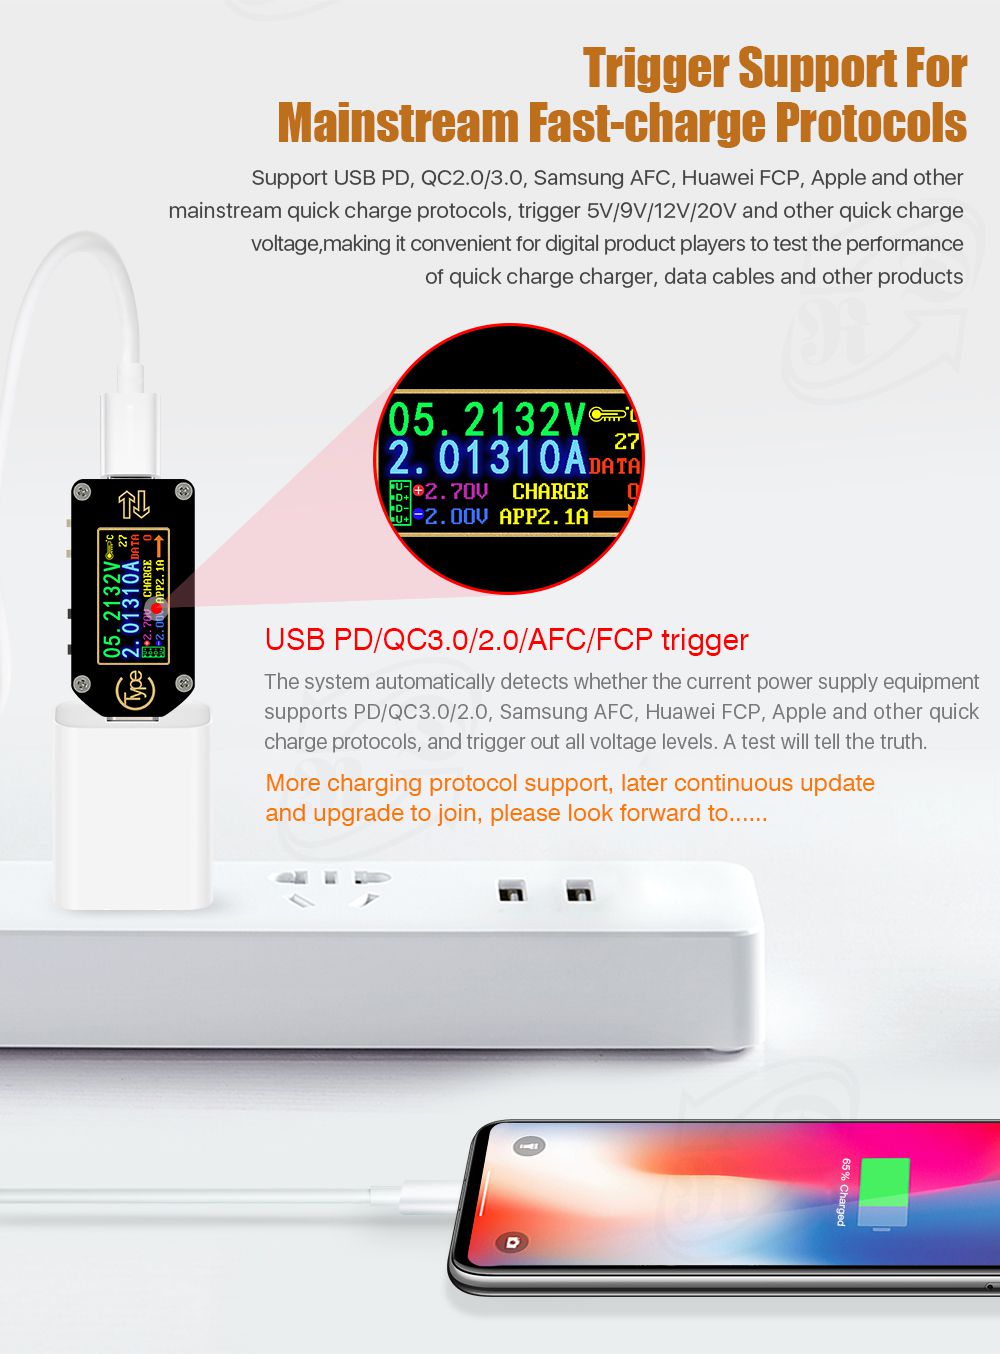
At this interface, press and hold K2 button to enter trigger menu, then Press K2 to page down to choose, after chosen,press K1 to enter sub-menu. At sub-menu, press K1 or K2 to begin trigger or adjust voltage. Press K2 back to last menu. Except for Huawei SCP and PPS, when other protocol exit trigger mode, they will keep the quick charging state, and re-plug the tester to be restored to the state of 5V. The current protocols supporting for trigger are QC2.0, QC3.0, HUWEI FCP, Huawei SCP PD2.0, PPS and SUMSUNG AFC.(This operation will make the type-c port output high voltage, please unplug the load when using this this function)
3.5.2PD trigger Operation
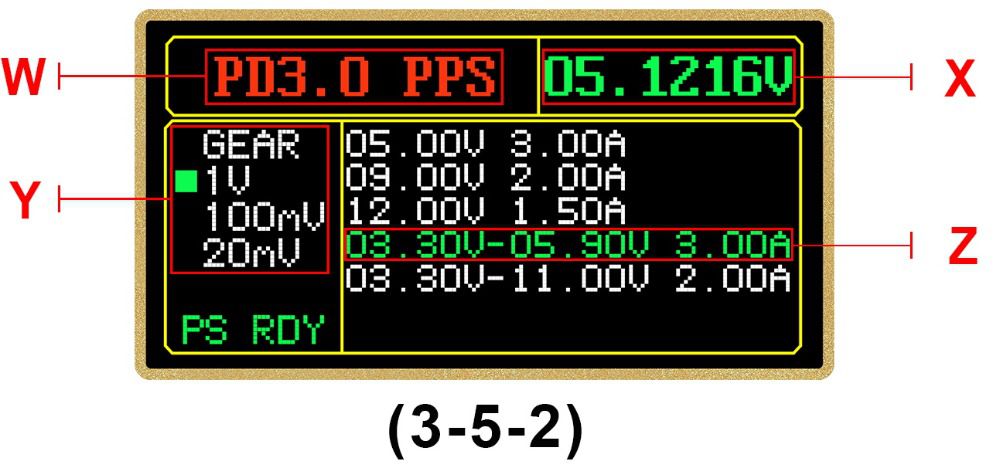
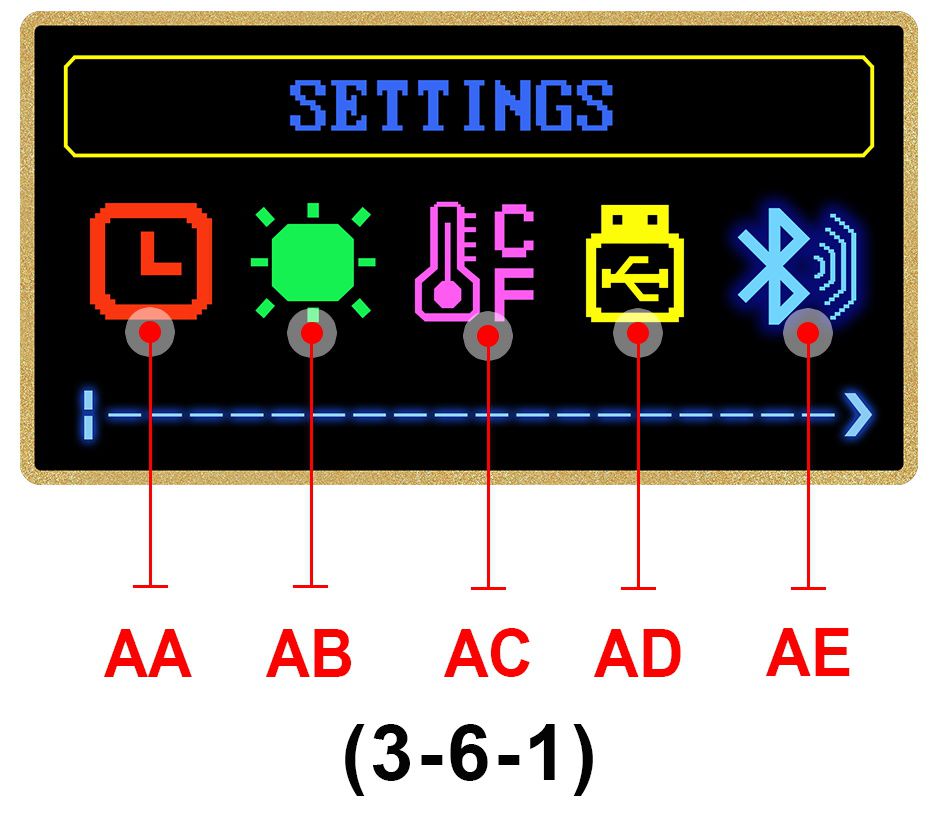
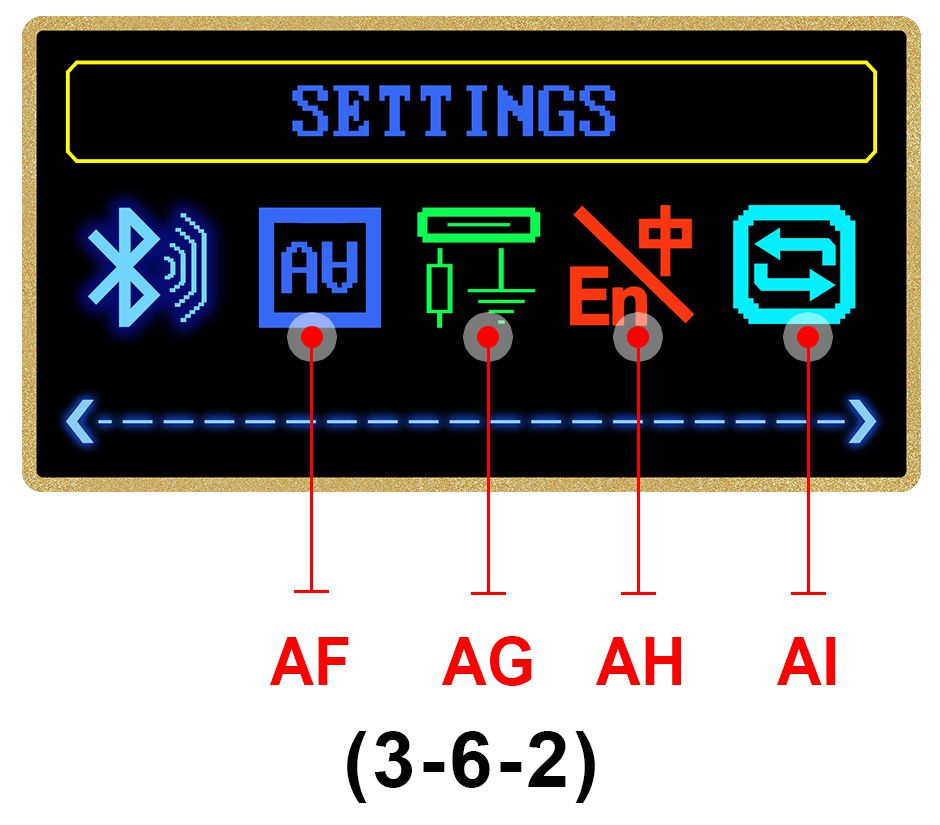
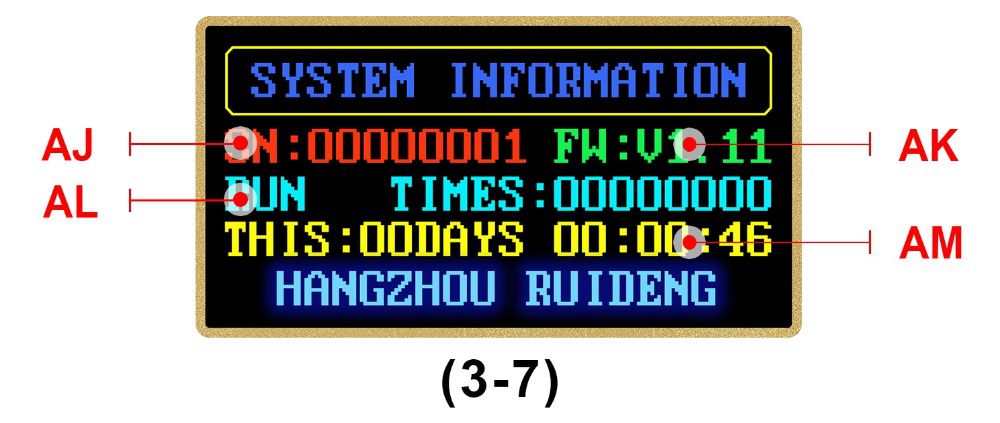

3.9Abnormal Status Solution
You can press and hold K2 button and power on TC66 under abnormal status to restore factory settings, or you can press and hold K1 and power on TC66 to enter the boot mode, and use PC software to update the firmware.

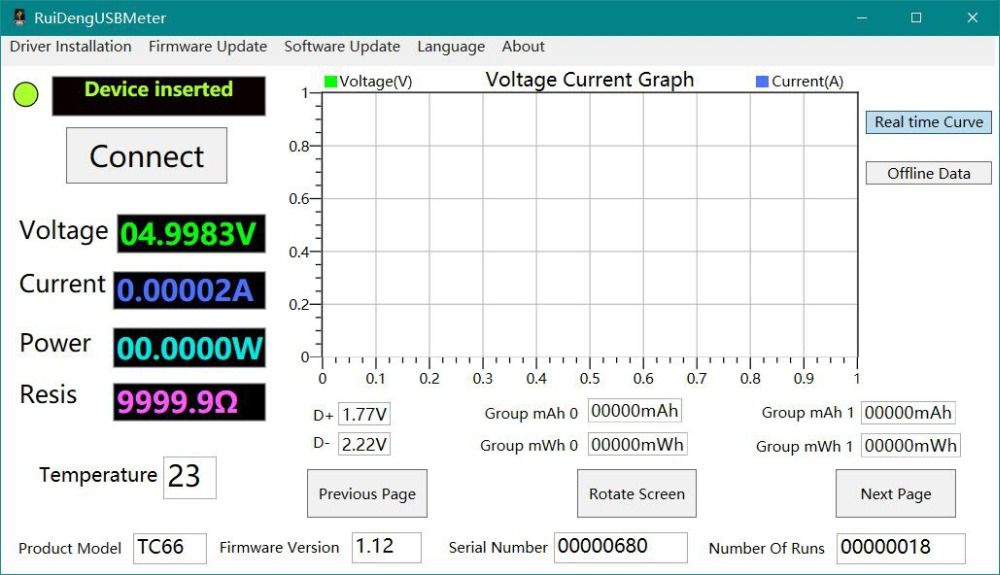
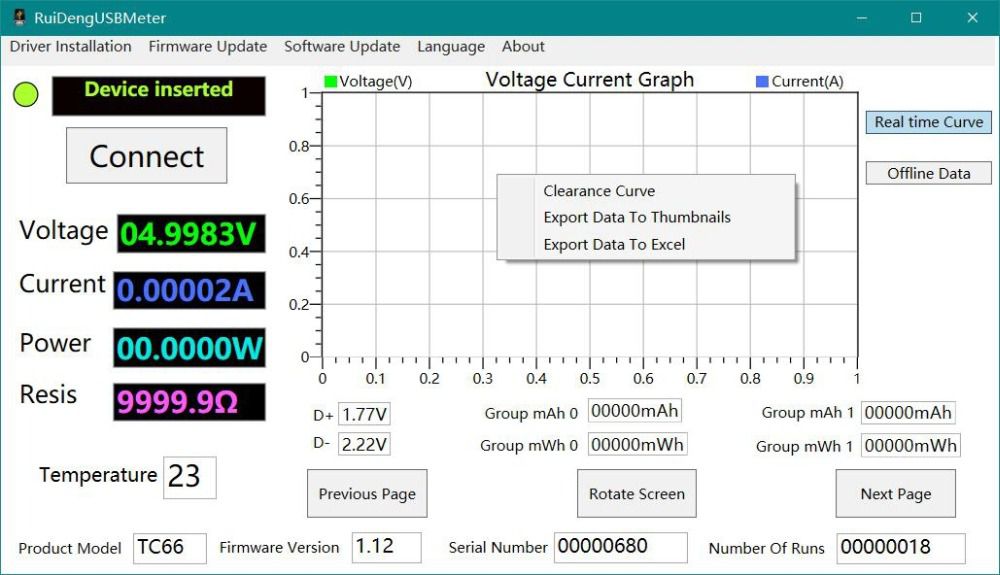
4.1.2 After the installation, double-click the RuiDengUSBMeter to open software. Do not edit or delete other files.
4.1.3 For the first time to use, select Driver Installation menu to install driver first.
4.1.4. After installation, Connect the tester micro-USB port to computer, the computer will automatically install driver, then unplug and plug it again, the prompt on upper left corner indicates that the device has been inserted, then click the “Connect” to use.

- Related Items
- Recommond Tools
- Hot Sale
- On Sale
- New Arrivals
- Freeshipping Items
-
US$289.00 / piece
-
US$159.00 / piece
-
US$55.00 / piece
-
US$169.00 / piece
-
US$989.00 / piece
-
US$439.00 / piece
-
US$139.00 / piece
-
US$299.00 / piece
-
US$39.99 / piece
-
US$44.99 / piece
-
US$989.00 / piece
-
US$229.00 / piece
-
US$354.00 / piece
-
US$2,345.00 / piece
-
US$1,598.00 / piece
-
US$389.00 / piece
-
US$289.00 / piece
-
US$629.00 / piece
-
US$74.99 / piece
-
US$328.90 / piece
-
US$2,599.00 / piece
-
US$563.99 / piece
-
US$1,199.02 / piece
-
US$199.00 / piece
-
US$179.00 / piece
-
US$259.00 / piece
-
US$44.99 / piece
-
US$70.00 / piece
-
US$699.00 / piece
-
US$19.99 / piece
-
US$159.99 / piece
-
US$35.99 / piece
-
US$19.99 / piece
-
US$50.00 / piece
-
US$28.25 / piece
-
US$39.99 / piece
Trending Products
- US$449.00 / piece
- US$1,587.00 / piece
- US$349.95 / piece
- US$139.00 / piece
- US$119.00 / piece
- US$179.00 / piece
 USD
USD Euro
Euro British Pound
 Australian Dollar







![[Full Version] V2022.12.1 KT200 ECU Programmer Master Version Support OBD BOOT BDM JTAG & ECU Maintenance/ DTC Code Removal With Free Damaos](/upload/pro/kt200-ecu-programmer-master-full-version-200.jpg)

